Hey guys, let’s cut to the chase—if you’re here, you’ve probably got a Mercedes E-Class with a busted ambient light, or maybe you just want to upgrade that drab stock set to something that actually matches your vibe. I’ve been selling E-Class ambient light kits for years now, and let me tell you, most people overcomplicate this. It’s not rocket science, I promise. Today, I’m walking you through exactly how to replace that unit yourself, no fancy tools or expensive mechanic bills required. And yeah, I’m gonna plug my own stuff a little—because let’s be real, I know these kits work, and I’ve spent way too long testing them on every E-Class model from W212 to the latest W214 to know what doesn’t suck. E Class Ambient Light

First off, let’s talk about why your ambient light might be messed up. I’ve had customers reach out to me saying their door light’s flickering, the dashboard strip is dead, or the whole system just won’t sync. Half the time, it’s not the wiring harness blowing—you’d be shocked how many people blame the car’s electronics before checking the actual light module. But if your light’s physically cracked, or the LED strip inside burned out (which is super common with old stock units, especially in hot climates), then replacement is non-negotiable. Before you even open your door, do a quick check: pull the interior fuse box diagram (it’s in your owner’s manual, or you can find a free PDF online) and check the ambient light fuse. If that’s blown, swap it first—way easier than yanking a door panel for nothing.
Now, let’s get into the tools you actually need. You don’t need a whole toolbox—just a few basic things that most people already have lying around. I recommend a plastic pry bar first, because metal ones will scratch your trim, and scratch marks on E-Class interior trim are a pain to hide. A Phillips head screwdriver (small, the kind you use for eyeglasses works for most door panels) and a T25 Torx driver—almost all E-Class use Torx screws for interior panels, so don’t show up with a flathead, you’ll strip the screw. A small pair of wire cutters or crimpers if you’re using an aftermarket kit, and a piece of electrical tape to wrap any loose connections. Pro tip: keep a small dish handy for screws—they’re tiny, and dropping one into the door panel is a nightmare. I’ve seen more than one customer panic because a screw rolled into the door’s inner frame, so just put all the little bits in a bowl before you start.
Let’s start with the most common spot people replace: door ambient lights. This is where most E-Class issues pop up, because door panels flex when you open and close the car, so wires can get pinched over time. First, pop the plastic cover off the interior door handle—this is where most pry bars work great, just work it along the edge and it’ll pop right off, no force needed. Under that handle, there’s usually a Phillips screw, so unscrew that and set it in your dish. Next, get your pry bar along the edge of the door panel, starting at the bottom corner (that’s the least noticeable spot, so less chance of scratching). Gently pry the panel loose—you’ll hear little clips popping, that’s normal, don’t yank it. Work your way up the sides, and once the whole panel is loose, lift it up slightly (there’s a little hook at the top that connects to the door frame, so don’t yank it straight out). Now, you’ll see the wiring harness for the lights—some doors have two, one for the lower door strip and one for the door pull. Disconnect the harness by pressing the little plastic tab on the connector (don’t pull the wires, that’ll fray them). Now, the light module is usually clipped into the door’s inner frame—just pop it out with your pry bar, pull the old light strip out, and pop the new one (from my kit, obviously) into place. Make sure it’s clipped tight, no gaps. Then reattach the wiring harness, plug it in, and do a quick test: turn the car’s ignition to accessory mode, crank up the ambient light brightness, and check if it works. If it does, put the door panel back on—align the top hook first, then snap all the clips back in, then screw the handle cover back on. Easy peasy.
Next up, the dashboard ambient light strips. This is a little trickier than the door panels, but still doable at home. First, you need to remove the dashboard trim piece that houses the ambient light. Again, grab your pry bar—start at the passenger side if you’re a beginner, because the driver side has the steering column, which you don’t want to mess with. Gently pry the trim along the edges, work your way from the bottom up, and it’ll pop loose. Underneath, you’ll see the dashboard ambient light module connected to the wiring harness—same as the doors, press the little tab to disconnect it. Now, pull the old light strip out—they’re usually stuck with a tiny bit of double-sided tape, so work it slow, don’t yank it, because the LED strips are thin and can break. Once the old one’s out, test fit your new strip (I make my kits with exact cut lengths for every E-Class model, so no trimming needed—no one wants to cut a strip wrong and waste it). Once it fits, peel the backing off the tape and stick it in place, making sure it’s aligned straight—if it’s off by even an eighth of an inch, you’ll see a dark gap. Reconnect the wiring harness, test the light again, then snap the dashboard trim back on. That’s it for the dash.
Wait, what about the rear seats and door lights? Same process as the front doors, fyi—most E-Class rear doors have almost identical panels, so you can just follow the front door steps. The only difference is sometimes the rear door panel has a speaker grille, so you just work around that when prying. If you have the optional trunk ambient light, that’s even easier—just pop the trunk trim panel (usually one screw and a clip), disconnect the old light, plug in the new one, and done.
Now, let’s talk about mistakes I see all the time from DIYers, especially those who buy cheap off-brand kits. First, don’t force anything—if a panel won’t pop off, you’re probably missing a screw somewhere. Check for tiny hidden screws under caps or around handles, I’ve had customers skip a screw right by the side mirror trim and then wonder why the door panel won’t budge. Second, don’t skip the test step before putting everything back together. I can’t tell you how many times a customer calls me panicking because they put the door panel back on, only to realize the light didn’t work because they forgot to plug the harness in. Test as you go, it saves so much time. Third, avoid those super cheap Amazon kits that have mismatched colors—mine have 64 color options, perfect sync with the car’s factory screen, and no flickering. I test every single kit before it ships, so you won’t have that annoying purple tint that looks nothing like your other lights.
Also, if you have a newer E-Class with MBUX system, syncing the new ambient light is even easier—my kits plug directly into the factory wiring, so you can control the color, brightness, and sync to music right from your MBUX screen, no extra apps needed. No coding required, I promise—unless you have a super early W212 model, and even then, I include a free guide with every kit to walk you through the two-minute coding step that takes 10 seconds with a basic OBD2 tool.
Let me wrap this up real quick. Replacing your E-Class ambient light isn’t hard, it just takes a little patience and the right parts. I’ve been doing this for years, and most of my customers are first-timers who come back for a second kit or refer a friend because it worked so well. If you’re ready to upgrade or fix your busted light, don’t waste time with generic parts—reach out and we can chat about what kit fits your specific E-Class model, get all the right parts, and answer any questions you have. No high-pressure sales, just real help from someone who actually knows these cars and these kits.
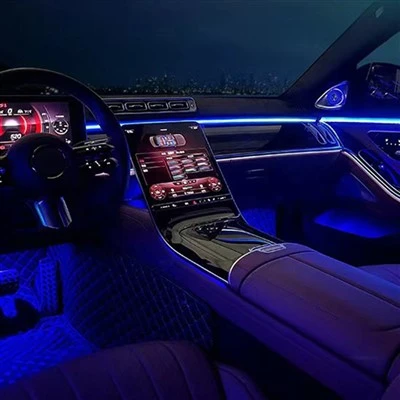
Before you go, quick recap: check your fuse first, use plastic pry bars to avoid scratches, test as you go, and invest in a quality kit that’s made for your E-Class, not a one-size-fits-all garbage. You can do this in an hour, max, and save yourself hundreds in mechanic fees. If you have any questions or want to order, just reach out to discuss. Thanks for reading, and go get those ambient lights working again.
C Class Ambient Light References:
- Mercedes-Benz Owner’s Manual, W212, W213, W214 Model Year Specifications
- Automotive Interior Trim Removal Guide, 2023 Edition
- LED Ambient Light Wiring Compatibility Standards for Mercedes-Benz E-Class Vehicles
Guangzhou Yuka Technology Co., Ltd.
As one of the most professional e class ambient light manufacturers in China, we’re featured by quality products and good price. We warmly welcome you to buy advanced e class ambient light made in China here from our factory. If you have any enquiry about quotation, please feel free to email us.
Address: 2nd Floor, No.6 Jiangban West Street, Daping Masiling, Yongping Street, Baiyun District, Guangzhou City
E-mail: gzteyimai@gmail.com
WebSite: https://www.gzyuka.com/
